Blueprints
The Blueprints view shows a paged list of the blueprints on your system. The list can be filtered using the Filter drop down at the top. The default filter is to show Active Blueprints (i.e., blueprints that have not been archived). Selecting a blueprint from the list will open the blueprint details panel on the right side of the list.
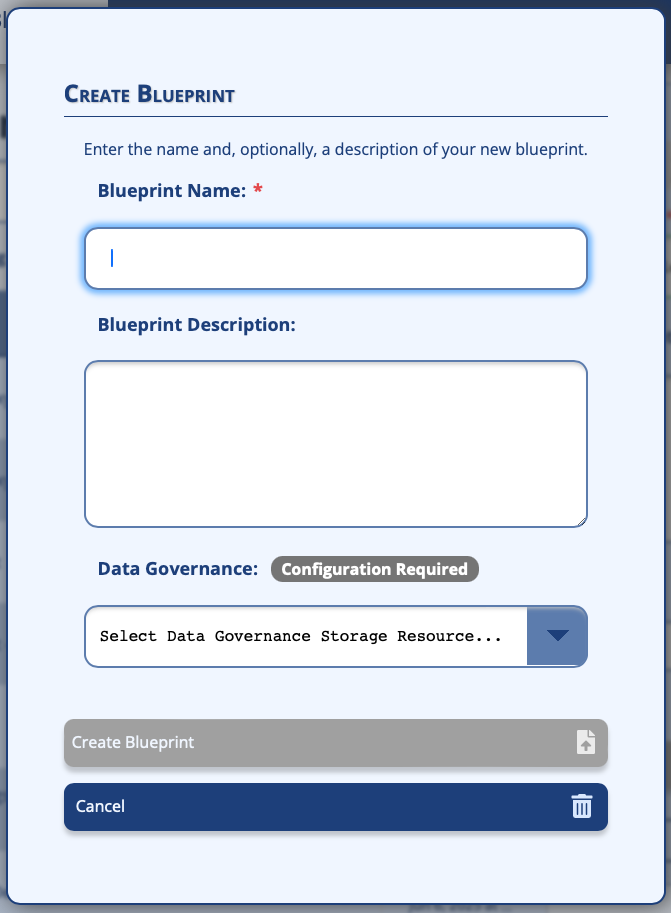
Create Blueprint
A New blueprint can be created by clicking the Create Blueprint button. This will open a dialog where you can specify the name and description of the new blueprint, as well as configure the Data Governance for the new blueprint. Once the required information is provided, you can click the Create Blueprint button to proceed. The new blueprint will be created and it will be opened in the Blueprint Details panel on the right side of the list.
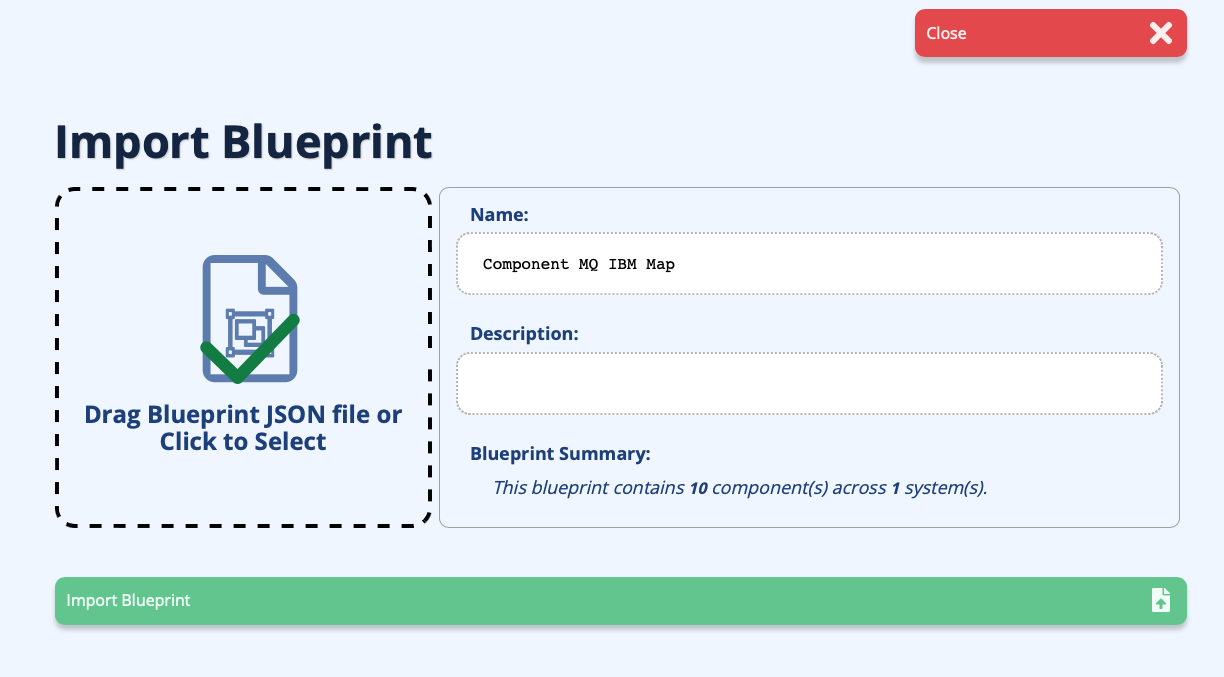
Import Blueprint
A Blueprint can be imported by clicking on the Import Blueprint button. The import view allows you to select the blueprint JSON you wish to import. You can either drag the JSON file onto the drop target, or click the drop target to open a file selection dialog. Once a blueprint file has been selected, the name and description of the blueprint will be populated along with a summary of the blueprint (e.g., system and component counts). To proceed with importing the blueprint, click the Import Blueprint button.
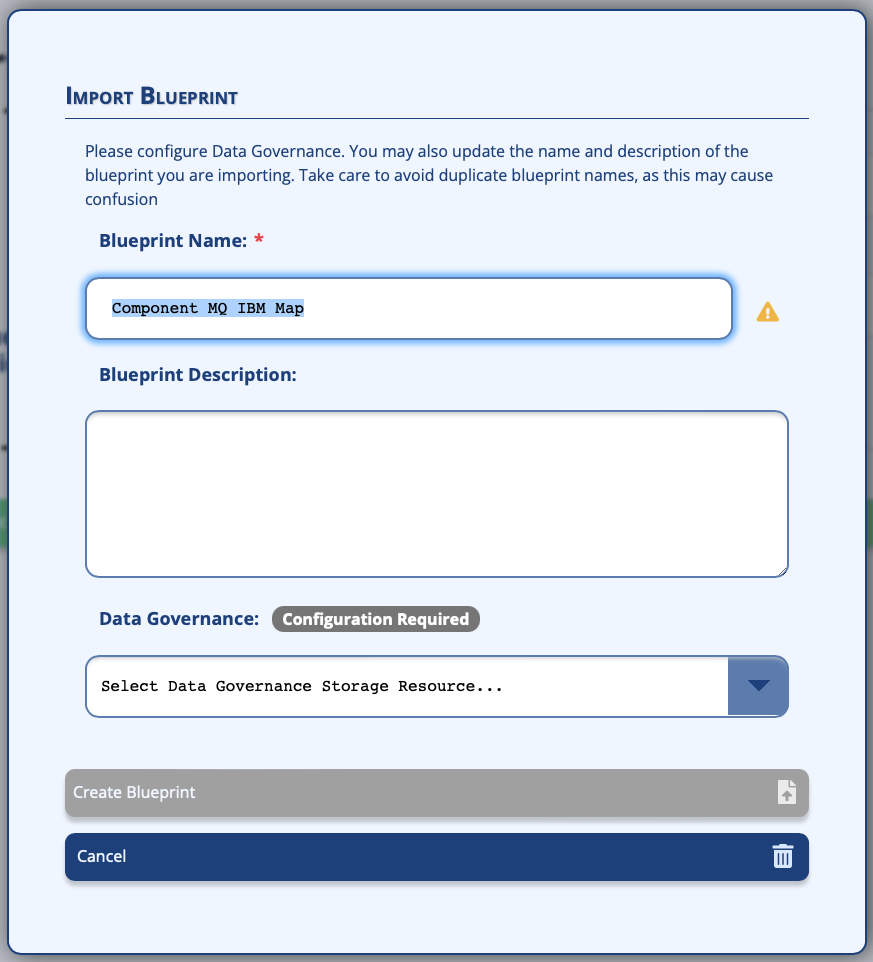
The Import Blueprint dialog will be shown allowing you to edit the blueprint name, description, and Data Governance configuration. If the name of the blueprint you are importing matches an existing blueprint, you will be given a warning indicator. It is recommended that you update the name of the blueprint to be unique to avoid confusion. Once you have set the Data Governance configuration for the new blueprint and made any other updates, click the Create Blueprint button. The blueprint will be validated before import.
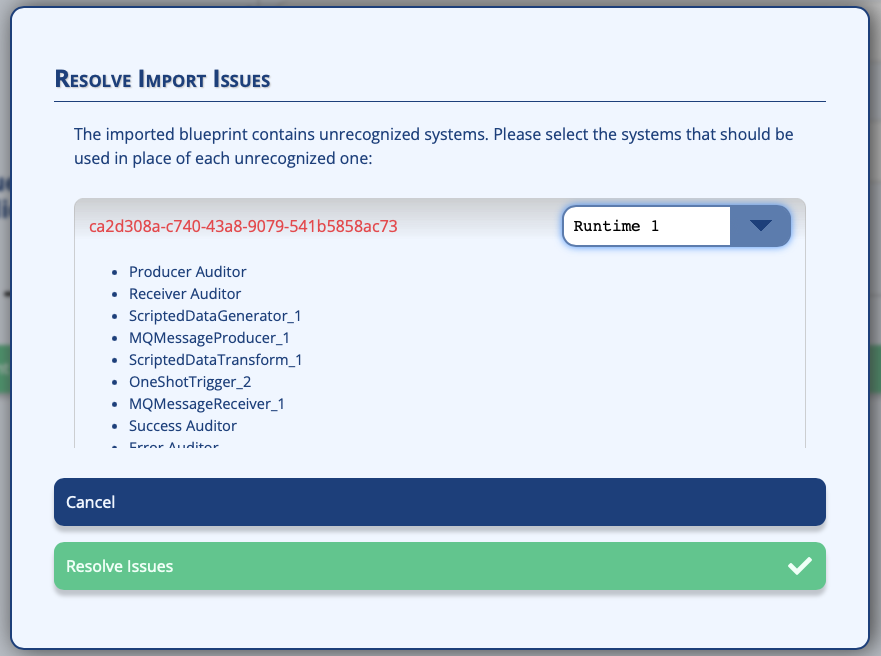
If there are validation issues, an issue resolution dialog will be displayed. This dialog identifies any unrecognized systems in the blueprint you are importing and asks you to select one of your existing systems to use in place of each unrecognized one in the blueprint. Once you have assigned known systems to each unrecognized system, you can click the Resolve Issues button to complete the import process.
Blueprint Details View
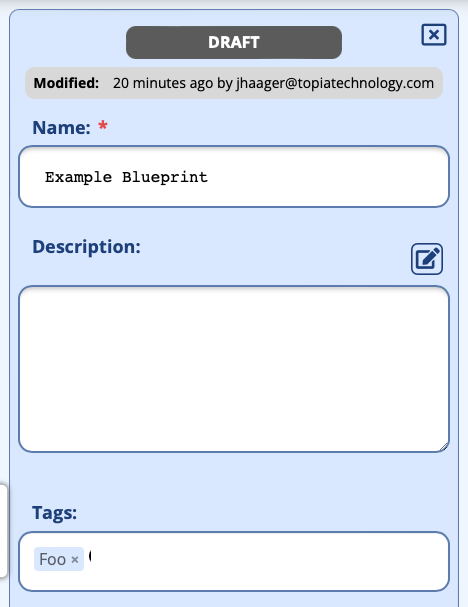
The Blueprint Details view provides access to the overall blueprint attributes, such as the name, description, and tags, as well as to common actions that might be made against a blueprint.
Blueprint Details
The Blueprint Details view contains key information about the blueprint.
Blueprint Status
The blueprint status indicates the current state of this blueprint: Draft, Published, or Archived. Draft blueprints are fully editable. Published blueprints cannot be edited and have been marked as ready for production use. Archived blueprints cannot be edited and have been marked as retired and no longer suitable for use.
Lock Status
If the blueprint is locked, the lock status is shown below the blueprint status. A blueprint can be unlocked, locked by you, or locked by another user.
Last Modification Information
The last modification information for the blueprint shows who last edited the blueprint and when.
Name
The name given to this blueprint. For draft blueprints, this value can be edited and updated if necessary.
Description
The description of this blueprint. The description is freeform and can be used to record and communicate any information you choose.
Tags
The tags assigned to this blueprint. Tags can be added by typing in the tag name and pressing enter. Existing tags can be removed by clicking on them and tapping backspace, or clicking on the X icon next to the tag name.
Note: Tags are not added to the blueprint until they are committed by hitting enter. Committed tags will be styled with the blue surround and the delete button.
Blueprint Action Buttons
At the bottom of the blueprint details view are a set of action buttons for common actions that can be performed on a blueprint.

Delete Blueprint
The delete icon will remove the blueprint from the system. You will be prompted to confirm the deletion.
Note: Deleted blueprints cannot be recovered. If you wish to keep the blueprint around for possible future use, consider Archiving the blueprint instead.
Archive Blueprint
The archive blueprint icon allows a blueprint to be archived. Archived blueprints are ones that are no longer under development or in use. They are retained by the system indefinitely.
Lock and Unlock Blueprint
Blueprints can be locked to prevent other users from editing them. This is useful when developing a new blueprint that isn't quite ready for other's to use. A locked blueprint can be viewed by other users, but they cannot edit it or deploy it. Once you are done working on the blueprint, you can unlock to make it available to other users.
Duplicating Blueprints
The Duplicate Blueprint button allows you to make a copy of this blueprint. A dialog will be shown asking you for the name of the copied blueprint. Once copied, the editor will reload with the new blueprint to allow editing.
Deploying Blueprints
The Deploy Blueprint button will attempt to deploy the blueprint. You will be prompted for a name for the new deployment, with the name defaulting to the blueprint name. As part of the deployment process, the blueprint will be validated to ensure that it is in a deployable state. If the blueprint cannot be deployed, an error dialog will be present informing you of all the issues detected in the blueprint. Once the deployment is successfully launched, the UI will navigate to the Deployment List and open the deployment details for the newly launched deployment.
Editing a Blueprint
To edit the content of the blueprint, click the Open button. This will open this blueprint in the Blueprint Editor.
Manage Tags
The Manage Tags button is available to administrators and will link them to the Tag Management page in theAdmin section. See the Tags page for more details.